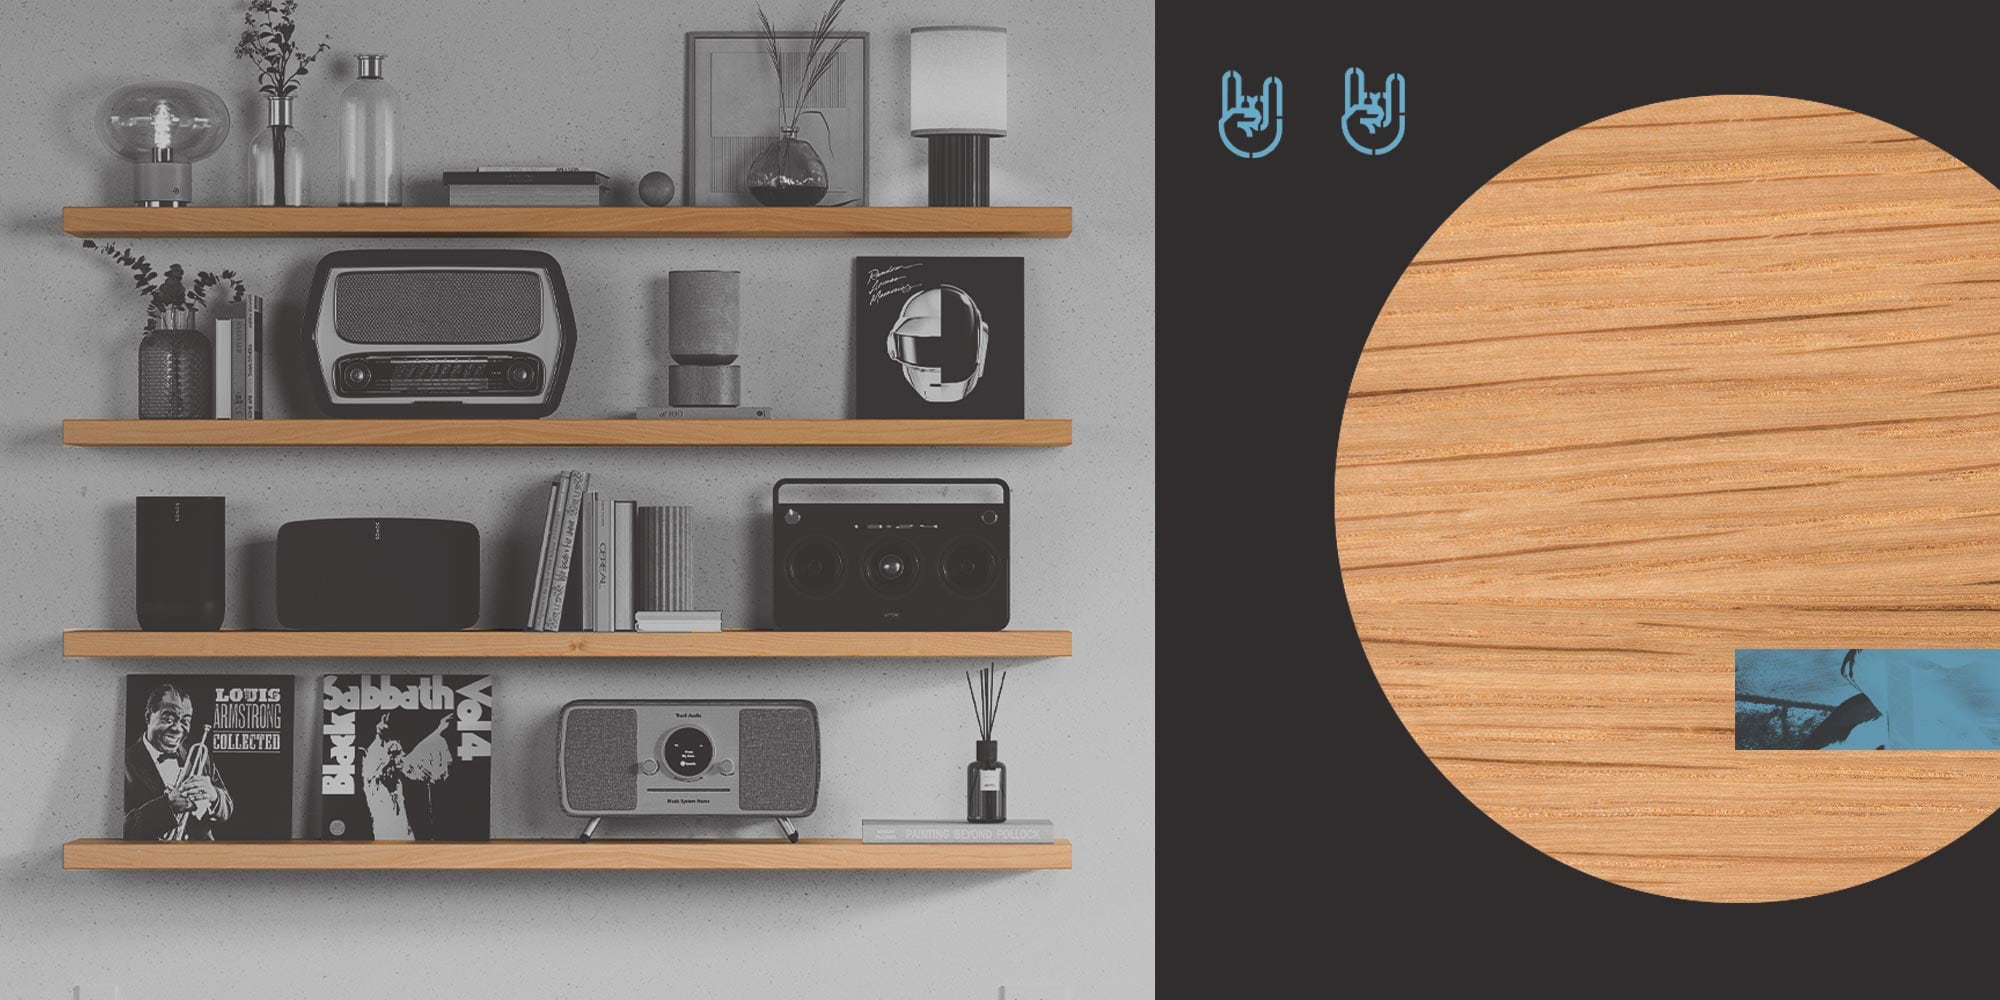
Are you planning a floating shelf project? If so, GET READY TO ROCK!
Have you been on Pinterest yet? There are so many ideas there, waiting for your creative interpretation to take wing. Or, perhaps you have that natural je ne sais quoi that your jealous friends long for. Regardless, floating shelves are incredibly popular right now—rightfully so!
Floating shelves are one of the easiest ways to take a space from boring to radical, and the team here at Shelfology is tearfully proud of you for wanting to learn more. We’ve got your back; here are seven steps to designing, hanging, and styling your very own shelfies!

Decorating Your Floating Shelves in 7 Easy Steps:
Step #1: Brainstorm for the Space
Looking at photos and Pinterest pins is fun, but you’re going to need to get specific for your own space. What kind of walls do you have? Slapping a floating shelf up onto a tiled or brick wall isn’t going to be easy, but if you plan it out right, it's gonna look UH-MAZING. Taking all of the space’s constraints into consideration, start thinking about what you want your shelf to be made out of, the style you’re going for, and what types of things you’re going to display on your soon-to-be-birthed, glorious shelving units.
Related-Radness: Is Open Shelving Right For You And Your Personal Style?
Step #2: Give Your Walls a Facelift

Before you install your shiny new shelves, this is a good time to touch-up paint, patch drywall holes, or clean that brick up. Start with a fresh, clean slate because the space behind your new shelving is going to be more difficult to reach once your shelves are up. Give the space a facelift in preparation for your rad new shelves.
Step #3: Select the Right Floating Shelf

In our opinion, this is the most important step. Once you’ve finished brainstorming space, you’ll have selected a color theme and other design considerations. When selecting your shelves, you have many different options. There are wood shelves with standard corners, rounded corners, additional hardware on the outside, thick surfaces, thin surfaces, and all manner of finishes/paint colors. You can also find metal shelves, some with photograph lips and some with colorful backplates. Take time and kick it around: What kind of shelves will look good in your space?
- Related-Radness: What is the Best Material for Floating Shelves?
Step #4: Install Your Shelving
This step is obvious… but super critical. Here’s why: if you don’t install your shelf properly, the beautiful things you display on your shelf won’t be safe. Follow the instructions for your shelf very carefully, being sure to use the proper hardware for the installation. DO NOT skip on finding studs. This step will ensure that your hardware is anchored into something that will allow your shelf to do its job: to defy gravity and seem like it’s, well, floating!
-
Related-Radness: How to Hang Your Floating Shelves Like a Boss
Step #5: Collect Items for Your Shelves

You probably know what you want to place on your shelves. If not, take stock of what you already own and carefully choose items in the style/color palette you’ve chosen for the space. Remember that neutrals like black or white can be used, regardless of your color palette. Set aside complementary pieces like candles, decorative boxes, small trays, little risers, small art pieces, photographs, books, little plants, and more. The more items you start with, the more options you’ll be able to try out!
You can also buy items specifically for your shelf, though this will obviously cost you more money. The benefit to this tactic is that you can achieve exactly the look you want with minimal trial and error. The downside, of course, is that none of the items will likely have intrinsic sentimental value, something that creates interest for you, the homeowner, for years to come.
- Related-Radness: Radical Floating Shelf Ideas for Every Room in Your House
Step #6: Try Different Colors, Textures, Materials, and Styles

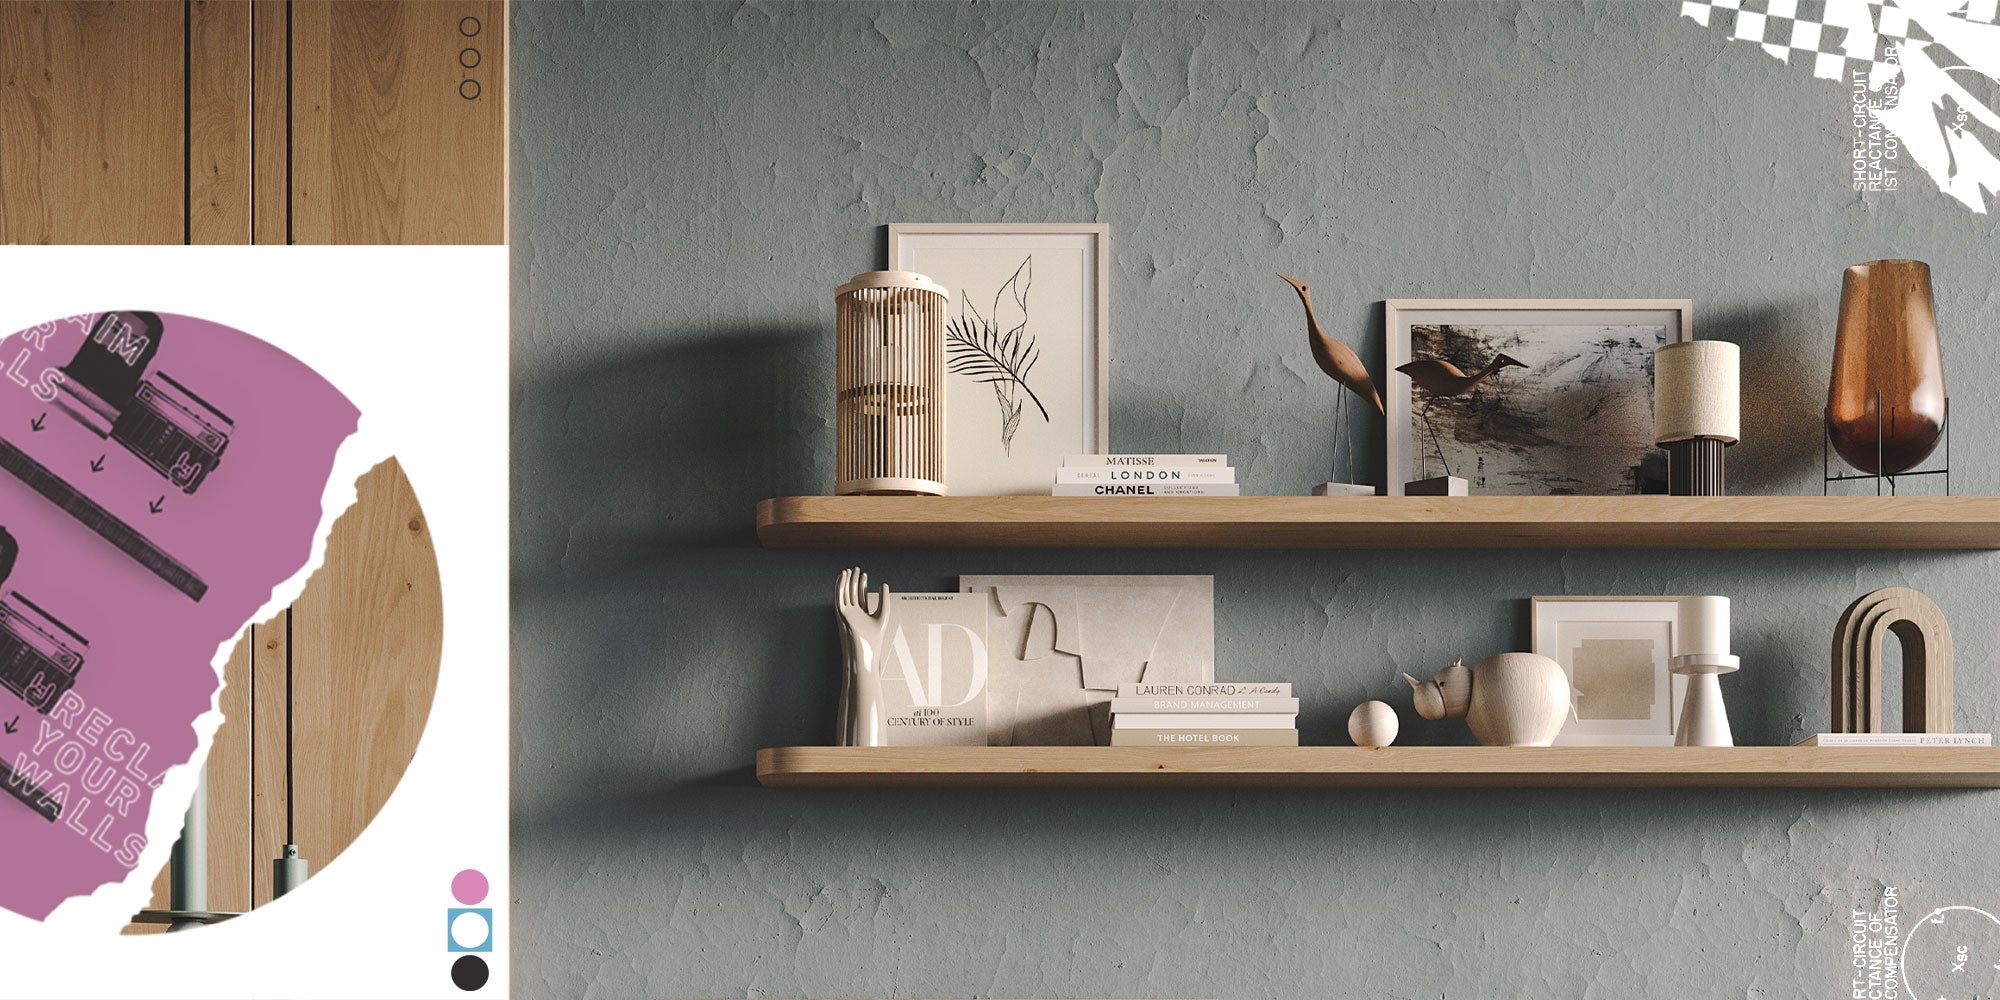
There’s a time and place for symmetry, but when you’re styling floating shelves probably isn’t it! Floating shelves look most visually pleasing when there’s some quirk and intrigue to the arrangement upon them. For this reason, you’ll want to select items with some pizazz and life to them; try out metallic objects, round vases, or even some fake plants! Onlookers will be none the wiser (we won’t tell them!). Ultimately, it’s your shelf—place items upon your glorious horizontal space that make your heart sing. You’ve got this.
Step #7: Don’t Neglect the Wall Space Around the Shelves

To create more visual interest, don’t just leave the wall space around your shelf blank. Depending on the color and texture of your wall, you may want to add a tall plant next to your floating shelves or hang a couple of photos. For example, a tall tree-like house plant off to the left of floating shelves with an art piece hanging below them would look great! Tie the green of the leaves into the shelving itself by displaying a green-covered book or a small potted cactus.
A Few Style-Master Tips for Picture-Perfect Ratios:
Tip #1: Create “Faux” Diagonals
This might be a little bit difficult to understand at first, but stick with us. By selecting items of varying heights and pairing them together in an ascending/descending fashion, you can create implied diagonal lines. This shape is incredibly pleasing to the human brain, so take advantage of that if you can.
Tip #2: Spice it Up, Baby

Don’t be afraid to throw in that POP of color that directs the eye towards one piece. This is a technique used by the best of the best and is sure to take your shelving project to a whole new level. Picking colors on the opposite side of the color wheel from your palette’s main color will have the greatest visual effect.
Tip #3: Use “Odd” Items
There’s no hard and fast rule for what should and shouldn’t go up on a floating shelf. In fact, we argue that nothing is off-limits. More eccentric, eclectic items will cause the viewer to ruminate more, contemplating their innermost thoughts. (Okay, maybe that is an exaggeration, but it will certainly look RADICAL!)
Tip #4: Use Plants

As we mentioned previously, plants are a wonderful addition to any shelf. It doesn’t seem to matter what else you place on a shelf… plants make every space more awesome. Use fake plants if you must, but real plants will give you street cred with your houseplant-loving friends. For example, a spider plant would both add life to your shelf and frame one side of the wall on the outside of your shelving as it droops down to create its glorious babies.
Tip #5: Don’t Use too Many Books

This isn’t a library we’re building, so limit yourself to three books. Unless you’re intending to build a magazine or a reading bookshelf, these items are for decorating purposes only. They should also match your color schematic. This rule really applies to everything else you choose to display, too. Don’t over-use any one type of item. It will be obviously unbalanced.
Tip #6: Flirt With the Negative Space
That’s right, we said it. Negative space has value, too! There should be relief from objects in at least one spot on each shelf. This will help create “pockets” of intrigue and “pockets” of relief so that the shelf itself sings, too.
Tip #7: Keep Your Color Palette Simple
There’s something to be said for the moderately berating saying “keep it simple, stupid!” When it comes to decor and styling spaces, less really is more. Especially when working with color, it’s easy for the human eye to get overwhelmed. When there are too many bold colors that work against non-neutral surfaces, the eye jumps around and cannot easily focus on one thing. We can avoid this in interior design by keeping the color palette simple.
-
Choose 2–3 neutral colors such as white, off-white, black, gray, or an earthen tone.
-
Choose 1–2 contrasting colors that work well with your textures such as bright red, bright yellow, lime green, or an electric blue.
Tip #8: Balance Does Not Equal Symmetry

You want to maintain “balance” on your shelves, but this is very different from symmetry. Balance simply refers to the overall appearance of items on the shelf, with respect to the color, size, and shape of the objects. Symmetry would rule that you need to achieve balance with respect to a center focal point. Now, symmetry can shine on a floating shelf, if that’s what you’re going for; however, it might be obvious and stale.
Balance, on the other hand, can create more visual interest as the brain attempts to hash out why each piece is where it is. It’s a technique that works extremely well for floating shelves. Try it out! If you love it, you love it; if you hate it, go back to symmetry.
Ready to Tackle Your Project?
Our team of shelf experts is rooting for you - like an odd, nerdy cheerleading squad with woodworking tools and aprons instead of shiny pom-poms and uniforms. So, order your shelves, don your safety glasses, grab your stud finder, and get to making some beautiful horizontal spaces!
To those about to rock, we salute you.

Share:
Design the Country Farmhouse Kitchen of Your Dreams with Hardwood Floating Shelves
Shelfology + Semihandmade + Anita Yokota Design: Making Beautiful Spaces Happen